| |
| |
| Manual Unpacking of UPX using OllyDbg |
| |
| |
| |
|
In this tutorial, you will learn how to unpack any UPX packed Executable file using OllyDbg
UPX is a free, portable, executable packer for several different executable formats. It achieves an excellent compression ratio and offers very fast decompression. |
| |
 |
| |
| Here we will do live debugging using OllyDbg to fully unpack and produce the original Executable FILE from the packed file. |
| |
| |
| |
|
| To start with, we need to pack sample EXE file with UPX. First you need to download latest UPX packer from UPX website and then use the following command to pack your sample EXE file. |
| |
| upx -9 c:\sample.exe |
| |
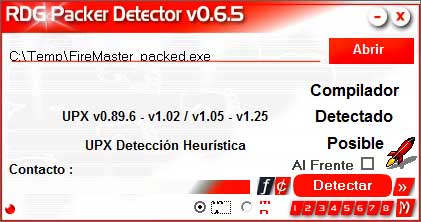
| If you already have UPX packed binary file then proceed further. In such case make sure to use PEiD or 'RDG Packer Detector' to confirm if it is packed with UPX as shown in the screenshot below. |
| |
 |
| |
| |
| |
|
|
Before we begin with unpacking exercise, lets try to understand the working of UPX.
When you pack any Executable with UPX, all existing sections (text, data, rsrc etc) are compressed. Each of these sections are named as UPX0, UPX1 etc. Then it adds new code section at the end of file which will actually decompress all the packed sections at execution time.
Here is what happens during the execution of UPX packed EXE file..
|
- Execution starts from new OEP (from newly added code section at the end of file)
- First it saves the current Register Status using PUSHAD instruction
- All the Packed Sections are Unpacked in memory
- Resolve the import table of original executable file.
- Restore the original Register Status using POPAD instruction
- Finally Jumps to Original Entry point to begin the actual execution
|
| |
| |
| |
|
Here are the standard steps involved in any Unpacking operation
- Debug the EXE to find the real OEP (Original Entry Point)
- At OEP, Dump the fully Unpacked Program to Disk
- Fix the Import Table
|
|
Based on type and complexity of Packer, unpacking operation may vary in terms of time and difficulty.
UPX is the basic Packer and serves as great example for anyone who wants to learn Unpacking.
Here we will use OllyDbg to debug & unpack the UPX packed EXE file. Although you can use any debugger, OllyDbg is one of the best ring 3 debugger for Reverse Engineering with its useful plugins.
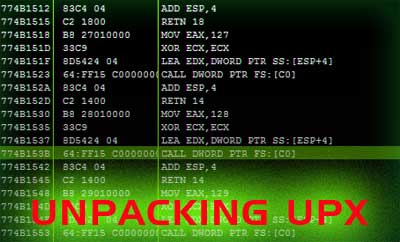
Here is the screenshot of OllyDbg in action |
| |
 |
| |
| |
| Lets start the unpacking operation |
- Load the UPX packed EXE file into the OllyDbg
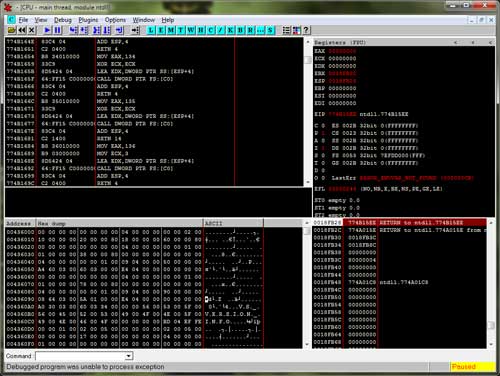
- Start tracing the EXE, until you encounter a PUSHAD instruction. Usually this is the first instruction or it will be present after first few instructions based on the UPX version.
- When you reach PUSHAD instruction, put the Hardware Breakpoint (type 'hr esp-4' at command bar) so as to stop at POPAD instruction. This will help us to stop the execution when the POPAD instruction is executed later on.
- Other way is to manually search for POPAD (Opcode 61) instruction and then set Breakpoint on it.
- Once you set up the breakpoint, continue the execution (press F9).
- Shortly, it will break on the instruction which is immediately after POPAD or on POPAD instruction based on the method you have chosen.
- Now start step by step tracing with F7 and soon you will encounter a JMP instruction which will take us to actual OEP in the original program.
- When you reach OEP, dump the whole program using OllyDmp plugin (use default settings). It will automatically fix all the Import table as well.
- That is it, you have just unpacked UPX !!!
|
| |
| |
| |
|
In the current example, OllyDmp plugin will take care of fixing the Import table.
However for most of the packers, we need to use advanced tool called ImpRec (Import Reconstructor). ImpREC is highly advanced tool used for fixing the import table. It provides multiple methods to trace the API functions as well as allow writing custom plugins. |
| |
 |
| |
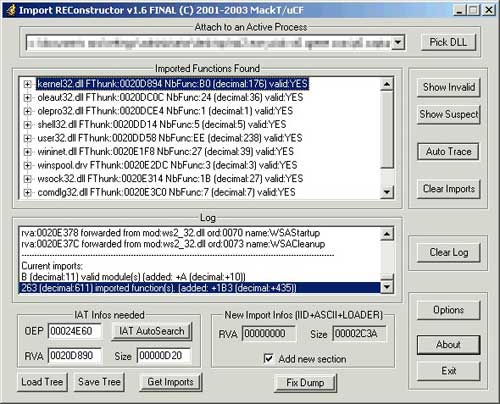
| For interested users, here are simple instructions on how to fix Import Table using ImpRec. |
- When you are at the OEP of the program, just dump the memory image of binary file using Ollydmp WITHOUT asking it to fix the Import table.
- Now launch the ImpREC tool and select the process that you are currently debugging.
- Then in the ImpREC, enter the actual OEP (enter only RVA, not a complete address).
- Next click on 'IAT Autosearch' button to automatically search for Import table.
- Now click on 'Get Imports' to retrieve all the imported functions. You will see all the import functions listed under their respective DLL names.
- If you find any import function which is invalid (marked as VALID: NO) then remove it by by right clicking on it and then from the popup menu, click on 'Delete Thunks'.
- Once all the import functions are identified, click on "Fix Dump" button in ImpREC and then select the previously dumped file from OllyDbg.
- Now run the final fixed executable to see if everything is alright.
|
For advanced packers, you may have to use different methods in ImpRec and some times need to write your own custom plugin to resolve the import table functions.
For more interesting details refer to our PESpin ImpRec plugin. |
| |
| |
| |
| |
|
|
| |
This video demonstration uses slightly different way to put a hardware breakpoint than described in the article. Also it uses ImpREC to fix import table which is useful while unpacking advanced packers.
Here are the steps shown in video |
- Load your EXE in Ollydbg
- Step Over (Shortcut-F8) PUSHAD instruction
- Next Go to ESP (right click and follow in DUMP Window)
- Put Hardware Read Breakpoint (Access) on first dword at ESP. (This is similar 'hr esp-4 at PUSHAD instruction as described earlier)
- Now Run EXE until we hit breakpoint (shortcut-F9)
- It will break right after POPAD instruction.
- You will see a JMP instruction few lines below the current instructions. Put breakpoint on JMP
- Run exe again until it stops at JMP instruction (shortcut-F9)
- Step Over JMP (Shortcut- F8)
- Now we are at OEP, Here just Dump Process using OllyDump without fixing Import table.
- Here we will use ImpREC to fix the import table as mentioned in 'Fixing Import Table' section.
- Finally after fixing import table, run the new unpacked EXE to make sure it is perfect !
|
| |
| |
|
- UPX: Ultimate
Packer for Executables.
- OllyDbg: Popular Ring 3 Debugger.
- ImpREC: Import
Table Reconstruction Tool
- PESpin Plugin for ImpREC
- RDG Packer Detector
- PEid Packer Detector
|
| |
| |
|
| Hacker Reversing Challenge 2007 |
| Writing PESpin plugin for ImpREC. |
| Faster way to enumerate process heaps. |
| Uncovering hidden process on Windows system. |
| Exposing the covert way to find the reference count of DLL. |
| |
| |
| |
| |
| |
| |